The first trial to create the BDA (bubble diagram algorithm) was in Rhino and grasshopper. To create a static bubble diagram with circles and lines is convenient using grasshopper and rhino. Even a statically drawn bubble diagram, gives the user the flexibility to change the size and the position of the bubbles at any point of time. Hence reworking is easy.
Below is one of the first trials of creating a basic bubble diagram. It is interesting to note that unlike most algorithms where you can loop to create repetitive patterns, in grasshopper looping works by breaking down components and extracting lists.

The points are drawn in Rhino and hence the points can be moved in the Rhino interface. See below how the bubble diagram can be manipulated in Rhino.

If you are wondering whether text can be added to the bubble diagram - the answer is yes. Text can be added and the size of the text can be changed too. The location of the text can be selected as well, but in this case I have been able to make the text sit only in the centre. I have also not been able to figure out how text can be wrapped in the circles.
The image below shows the addition of text in the bubble diagram.

So to brief it up and to list down the steps to arrive at this bubble diagram :
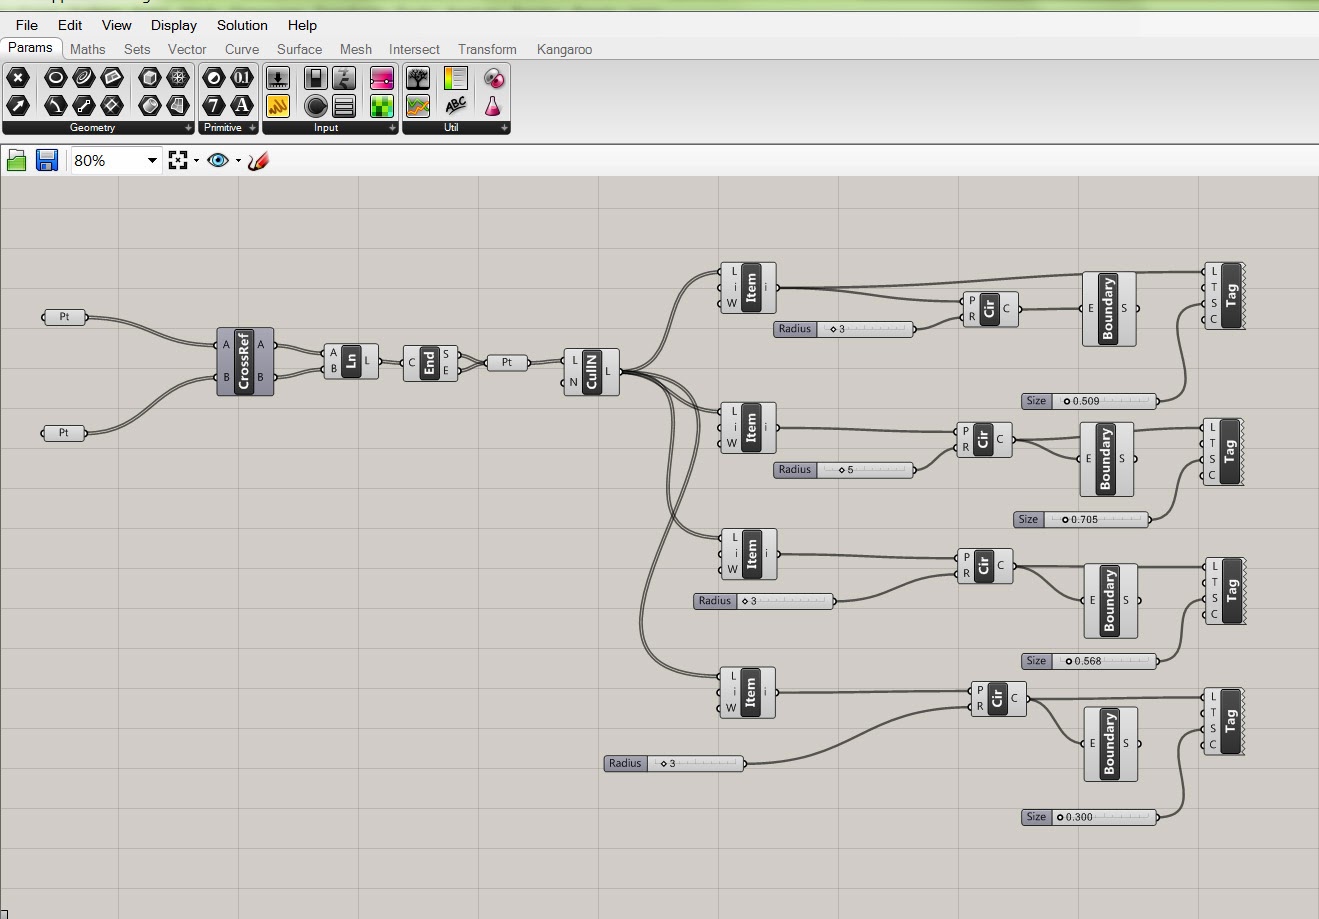
1 - Draw points in Rhino. These points are the centre of the circles that represents the bubbles of the bubble diagram.
2- In GH ( Grasshopper) assign these points to the points parameter.
3 - In case you want to criss cross lines between all the points - duplicate the points parameter. Now both the points parameter contain all the points in Rhino.
Use the CrossRef parameter to plug in the points parameter and give the output geometry as a line.
4- To draw the circles, extract the end points of the lines. Collect all the output of start point and end point in a point parameter.
5- Use the CullN to cancel off repeated points and avoid drawing two circle from the same centre point.
6- Extract the list of the points using List Item parameter. Draw circles from the extracted list.
7- Use the Boundary to create a plane from the circle. Which gives it the red colour.
8- Add the text Tags using the Tags component.
Below is the image showing all the steps in the GH window.
Below is one of the first trials of creating a basic bubble diagram. It is interesting to note that unlike most algorithms where you can loop to create repetitive patterns, in grasshopper looping works by breaking down components and extracting lists.
The points are drawn in Rhino and hence the points can be moved in the Rhino interface. See below how the bubble diagram can be manipulated in Rhino.
If you are wondering whether text can be added to the bubble diagram - the answer is yes. Text can be added and the size of the text can be changed too. The location of the text can be selected as well, but in this case I have been able to make the text sit only in the centre. I have also not been able to figure out how text can be wrapped in the circles.
The image below shows the addition of text in the bubble diagram.
So to brief it up and to list down the steps to arrive at this bubble diagram :
1 - Draw points in Rhino. These points are the centre of the circles that represents the bubbles of the bubble diagram.
2- In GH ( Grasshopper) assign these points to the points parameter.
3 - In case you want to criss cross lines between all the points - duplicate the points parameter. Now both the points parameter contain all the points in Rhino.
Use the CrossRef parameter to plug in the points parameter and give the output geometry as a line.
4- To draw the circles, extract the end points of the lines. Collect all the output of start point and end point in a point parameter.
5- Use the CullN to cancel off repeated points and avoid drawing two circle from the same centre point.
6- Extract the list of the points using List Item parameter. Draw circles from the extracted list.
7- Use the Boundary to create a plane from the circle. Which gives it the red colour.
8- Add the text Tags using the Tags component.
Below is the image showing all the steps in the GH window.
No comments:
Post a Comment